Water Leak Sensor Placement Guide: 7 Spots Pros Check First in 2026
I spent a wet Saturday afternoon last fall crawling under my own kitchen sink with a flashlight, chasing a phantom puddle that turned out to be a pinhole leak in the dishwasher supply line. The sensor I’d bought six months earlier was sitting in a drawer, still in its blister pack, because I assumed any cheap detector would do the job. It wouldn’t have—the sensor itself was fine, but my placement plan was worthless. That’s when I learned the hard way that water leak sensor placement matters more than the sensor brand. In 2026, with smarter detectors and more homes wired for alerts, the difference between a $20 fix and a $5,000 insurance claim often comes down to where you put the puck. Here’s what I now check first, based on what pros actually do.
Why Pro Leak Sensor Placement Matters More Than the Sensor Itself
I used to think the biggest variable in leak detection was the sensor’s Wi-Fi range or its decibel level. Then my neighbor’s basement flooded last March. He had three top-rated Z-Wave sensors scattered around his utility room—and every single one missed the burst pipe because it was placed too far from the actual failure point. The water ran behind a water heater, pooled against a wall, and never touched a contact. His insurance covered the claim, but his deductible was four times the cost of a proper sensor installation. Pros call this the “coverage gap”—a sensor that’s technically present but functionally useless because it’s positioned in a dry zone. The rule of thumb I now follow is within six inches of any water source, not six feet. That simple adjustment would have saved my neighbor’s drywall.
Spot #1 – Under Every Major Water-Using Appliance (The ‘First Contact’ Zone)
When I installed my first dishwasher sensor, I stuck it on the floor right under the center of the appliance. That was a rookie mistake. The water from a supply-line failure tends to spray sideways, not straight down, so the first wet spot is often near the front edge or the back corner where the hose enters. Pros place sensors directly under the supply line connection—not the center of the appliance. For dishwashers, that means pulling the unit out slightly, locating the braided steel hose, and setting the sensor on the floor right beneath that coupling. For washing machines, the same logic applies, but add a second sensor under the drain hose if your machine sits on a concrete floor. I also put one under my refrigerator’s ice maker line after a friend’s slow drip ruined her hardwood floor; she never saw it because the water wicked under the fridge’s base trim. Pro tip: If your appliance sits on a drip pan, place the sensor at the lowest point of the pan’s rim, not the flat bottom—water pools at the edge first.
Spot #2 – At the Base of Toilets and Under Sinks (The Silent Drip Zone)
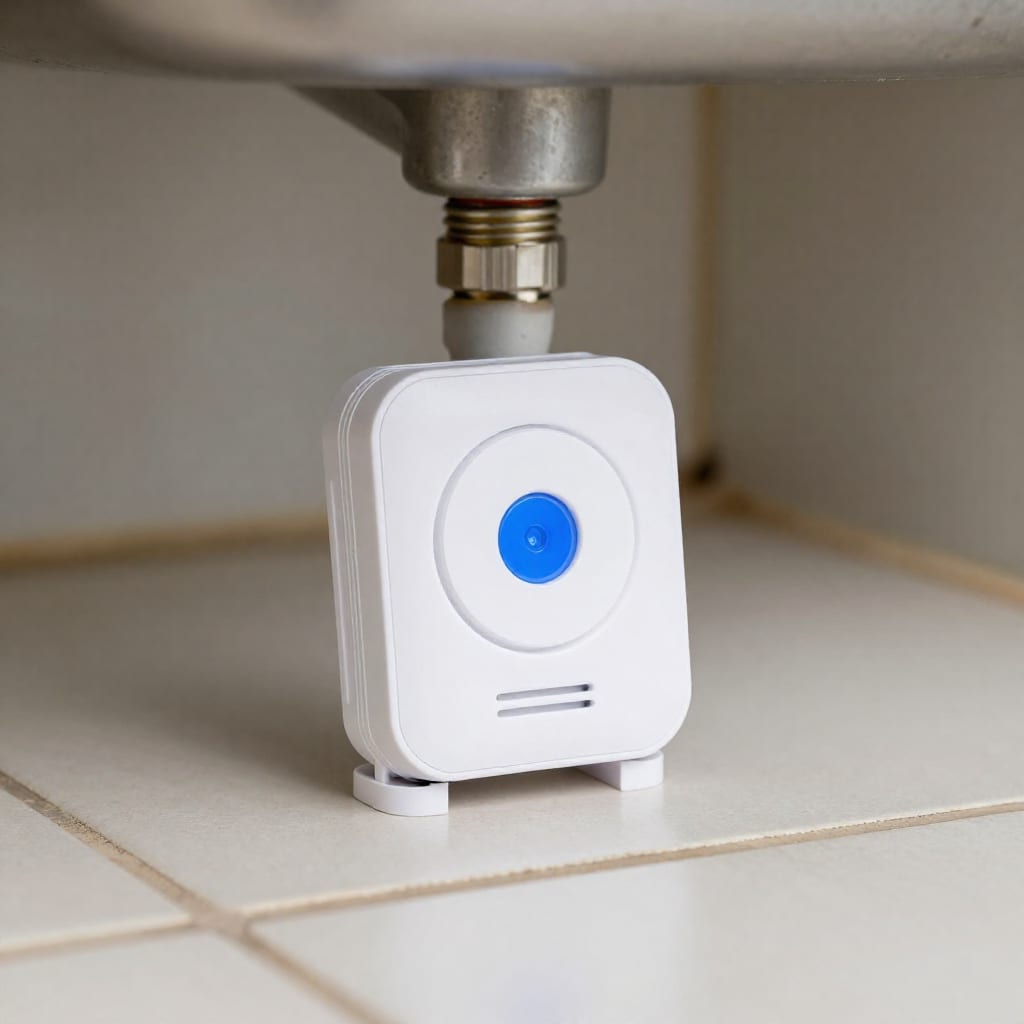
Toilets and sinks are the most ignored leak sources in most homes. I learned this the week I replaced a wax ring on a 15-year-old toilet that had been weeping for months—the only sign was a faint discoloration on the vinyl flooring. A sensor placed at the base of the toilet, flush against the floor, would have caught that drip within hours. But there’s a catch: condensation from a toilet tank in humid weather can trigger a false alarm if the sensor’s contacts touch the cold porcelain. Position the sensor about an inch away from the toilet base, not directly under the rim, so only liquid water—not condensation—sets it off. Under sinks, the danger zone is the P-trap and the supply line connection. I place a sensor on the cabinet floor directly below the shut-off valve, where a slow drip from a loose compression nut will hit first. For double sinks, one sensor per side is overkill; a single sensor centered between the two drain pipes covers both. Just make sure it’s not sitting on a damp sponge or a leaky bottle of cleaner—that’s a false alarm waiting to happen.
Spot #3 – Near the Water Heater and Main Shut-Off Valve (The High-Risk Core)
My own water heater is a gas model that sits in a corner of the garage. The temperature and pressure (T&P) relief valve is the most common failure point, and when it goes, it can dump gallons in minutes. Pros put a sensor directly under the T&P valve’s drain pipe, not on the floor in front of the unit. That pipe usually terminates about six inches above the floor, so a sensor placed on the floor under that opening catches the first water. For electric water heaters, the same logic applies, but I also add a second sensor near the bottom of the tank where sediment can cause a slow leak from the drain valve. The main shut-off valve is another critical spot: if the valve itself is old and corroded, a tiny drip can run down the pipe and pool on the floor. I place a sensor on the floor directly under the valve handle, and I check it quarterly because dust can insulate the contacts over time. A spare sensor in a zip-top bag lives in my toolbox for this spot—it’s too important to skip.
Spot #4 – Behind Refrigerators and Ice Makers (The Hidden Slow Leak)
Of all the leaks I’ve seen, the ones behind refrigerators are the most insidious. The ice maker line is a thin plastic tube that can develop a pinhole leak from repeated flexing when you pull the fridge out to clean. A sensor placed on the floor behind the fridge, directly under where the water line enters the unit, will catch that drip before it runs under the baseboard. Don’t put the sensor inside the fridge—it’s too cold and condensation will ruin the electronics. I use a slim-profile sensor that fits in the gap between the back of the fridge and the wall; some smart sensors are only a quarter-inch thick and can slide under the fridge’s front kickplate if you don’t have rear access. For standalone ice makers (like those in a wet bar or basement), the same rule applies: place the sensor on the floor directly under the supply connection, not on the counter or inside the unit. I learned this after a friend’s ice maker line burst while she was on vacation—the water ran for three days before a neighbor noticed the puddle in the hallway.
Spot #5 – In Basement Crawlspaces and Near Sump Pumps (The Low-Ground Zone)
Basements are the lowest point in most homes, which means water from any source—burst pipe, foundation seepage, sump pump failure—will accumulate there first. My grandfather’s house had a sump pump that failed during a spring storm; the water rose eight inches before anyone noticed because the alarm was mounted on the wall, not on the floor. Place a sensor on the basement floor at the lowest elevation, typically near the sump pit or floor drain. If you have a crawlspace, the trick is to avoid placing the sensor on dirt or gravel, which can cause false triggers from moisture vapor. Instead, mount it on a small plastic platform or a piece of treated wood. For sump pumps, I put a sensor inside the sump pit (if the manufacturer allows it) or on the floor right next to the pit, set to trigger when water reaches the rim. A second sensor near the basement’s exterior wall can catch foundation seepage before it spreads. Test these sensors monthly—basements are dusty, and dust can bridge the contacts or block the water path.
Spot #6 – Inside HVAC Drip Pans and Near Water Softeners (The Seasonal Risk)
HVAC condensate lines are a seasonal hazard. In summer, a clogged drain line can cause the drip pan to overflow, dumping water onto the attic floor or basement ceiling. I place a sensor directly on the drip pan floor, at the lowest corner, where water will pool first. Make sure the pan is clean and dry before placement—any residual moisture will trigger a false alarm. For water softeners, the brine tank can overflow if the float valve sticks, and the softener’s control valve can develop a slow drip. I put a sensor on the floor under the brine tank’s overflow port, and another under the main valve body. The tricky part is that water softeners are often in garages or utility closets with concrete floors, which can wick moisture from the slab. To avoid false alarms, I use a sensor with a raised contact plate or a small rubber mat under the sensor. A neighbor once had a sensor that chirped every time it rained because the garage floor got damp; a simple spacer solved it.
Spot #7 – Near Outdoor Hose Bibs and Laundry Sink (The Exterior-Interior Link)
Outdoor hose bibs are a common entry point for water damage, especially in colder climates where freeze/thaw cycles crack the pipe inside the wall. Place a sensor on the floor directly under the hose bib’s interior access panel (if you have one) or on the basement floor beneath the bib’s pipe. If the bib is on an exterior wall with no interior access, I put a sensor in the wall cavity through a small hole drilled near the floor, then seal the hole with silicone. For laundry sinks, the risk is a backup from a clogged drain line. I place a sensor on the floor under the sink, centered between the two drain pipes, and set it to trigger on any water—not just a flood. A smart sensor with a “dry contact” output can also trigger a shut-off valve for the washing machine, which is a pro-level upgrade I recommend for anyone with a second-floor laundry room. One caveat: outdoor sensors must be rated for temperature extremes; a standard indoor sensor will fail in freezing weather.
Pro Tips for Mounting and Avoiding False Alarms
After placing sensors in all seven spots, I’ve collected a short list of best practices that separate a working system from a nuisance. First, keep sensor contacts off metal surfaces—metal can conduct static or cause galvanic corrosion, which leads to false triggers. Use the plastic standoffs that come with most sensors, or buy a pack of small rubber feet. Second, test every sensor monthly by pressing the test button or touching the contacts with a damp finger. I set a recurring calendar reminder on my phone. Third, replace batteries annually, even if the low-battery alert hasn’t sounded. I learned this the hard way when a sensor in my crawlspace went silent during a power outage—the battery was dead, and I didn’t know until the next rainstorm. Fourth, avoid placing sensors near HVAC vents or drafty windows, where temperature swings can cause condensation on the sensor body. Finally, if you have a smart hub, set up automations to send alerts to your phone and a family member—a single notification might be missed if you’re at work. I have mine set to also flash a smart bulb red in the hallway, which is impossible to ignore.
FAQ
How many water leak sensors do I need for a typical home?
For a 3-bedroom house, plan on at least 6–8 sensors: one under each major appliance (dishwasher, washing machine, refrigerator), one per toilet (prioritize upper floors), one under the kitchen sink, one at the water heater, one in the basement or crawlspace near the sump pump, and one near the main shut-off valve. Add more for secondary bathrooms and outdoor hose bibs. Start with the highest-risk spots first—you can always add more later.
Can I place a leak sensor directly on a concrete floor?
Yes, but with a caveat. Concrete floors can wick moisture from the ground, causing false triggers from condensation or dampness. Use a sensor with raised standoffs or place it on a small rubber mat to keep the contacts off the concrete. If your basement floor is prone to dampness, test the sensor’s false-alarm rate for a week before trusting it.
Will a leak sensor work if placed inside a drip pan?
Yes, as long as the pan is clean and dry before installation. Place the sensor on the lowest edge of the pan so water pools against the contacts first. Avoid placing it in the center of the pan, where water might not reach until the pan is nearly full. Also, make sure the sensor’s battery is accessible—you don’t want to have to drain the pan just to change a battery.
Do I need sensors near every toilet and sink?
Not necessarily. Prioritize toilets on upper floors (where a leak causes more damage to ceilings below) and those with visible signs of wear like a cracked wax ring or old flex hose. For sinks, prioritize those with visible supply lines and shut-off valves that haven’t been replaced in 10+ years. A general rule: if you can see any water stain or corrosion under the sink, a sensor is a good idea.
How often should I test or replace leak sensor batteries?
Test sensors monthly by pressing the test button or using a damp finger. Replace batteries annually, or as soon as the low-battery alert sounds. Some smart sensors with long-range radios can last 2–3 years, but I replace them every 12 months anyway to be safe. Keep a spare set of batteries in your sensor kit so you’re never caught without.
Bottom line: A water leak sensor is only as good as its placement. Skip the guesswork and stick to these seven spots, test regularly, and you’ll catch most leaks before they become disasters. Worth bookmarking before your next trip to the hardware store.